In this article, we’ll show how to interface STM32 microcontrollers with the ADC128S102 using SPI. This integration enables accurate analog-to-digital conversion for various applications.

Things used in this project
Software apps and online services:
1- STMicroelectronics STM32CubeMX
2- STMicroelectronics STM32CubeIDE
3- Proteus 8
STM32 ADC128S102 SPI: Multi-Channel Data Acquisition | Proteus Simulation
This project aims to seamlessly integrate STM32 microcontrollers with the ADC128S102 analog-to-digital converter (ADC) using the Serial Peripheral Interface (SPI) protocol, within the context of embedded systems.

Exploring the Functionality of ADC128S102 with STM32 in SPI Communication:
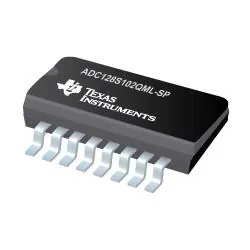
The ADC128S102 stands as a pinnacle of precision in analog-to-digital conversion, featuring eight channels for simultaneous signal acquisition with a 12-bit resolution. With conversion throughput rates ranging from 50 kSPS to 1 MSPS, this ADC ensures exceptional performance and reliability across diverse embedded applications. Supporting various serial interface standards, including SPI, the ADC128S102 serves as a cornerstone in high-speed data acquisition systems.
Leveraging SPI Communication for Integration of STM32 and ADC128S102:
At the core of this integration lies the SPI communication protocol, facilitating synchronous serial communication between the STM32 MCU and the ADC128S102. Through signals such as chip select (CS), serial clock (SCLK), serial data input (DIN), and serial data output (DOUT), we establish a robust data exchange mechanism. By meticulously configuring and synchronizing these signals, seamless communication is orchestrated, empowering the STM32 MCU to command the ADC128S102 and effortlessly retrieve digitized analog signals.
To kickstart this project, we’ll begin by setting up the STM32 in SPI Full-Duplex Master mode, an essential initial phase in establishing smooth communication with the ADC128S102. Next, we’ll configure the GPIO pins, such as PA4, as OUTPUT to ensure accurate control over peripheral devices. Lastly, we’ll integrate UART communication, facilitating the precise and efficient transmission of temperature data and system status updates
STM32CubeMX Configuration:
- Open CubeMX & Create New Project Choose The Target MCU STM32F103C6 & Double-Click Its Name
- Go To The Clock Configuration & Set The System Clock To 8MHz
Configuration for the GPIO Mode:
- Configure The GPIO Pin PA4 as Output Pin (CSPin)
Configuration for the SPI Mode:
- In the Categories tab, select the SPI1 & Full-Duplex Master
- In the Parametre tab, set the Prescaler (for baud Rate) = 8
Configuration for the UART Mode:
- Enable USART1 Module (Asynchronous Mode)
- Set the USART1 communication parameters (baud rate = 9600, parity=NON, stop bits = 1, and word length =8bits)
- Generate The Initialization Code & Open The Project In CubeIDE
STM32CubeIDE Configuration
- Write The Application Layer Code
- main.c
- /* Includes ------------------------------------------------------------------*/
- #include "main.h"
- #include <math.h>
- #include <stdio.h>
- #include <string.h>
- /* Private variables ---------------------------------------------------------*/
- SPI_HandleTypeDef hspi1;
- UART_HandleTypeDef huart1;
- /* USER CODE BEGIN 0 */
- #define REF 5.0
- int readADC(int chan)
- {
- uint8_t txData[2] = {chan << 3, 0};
- uint8_t rxData[2];
- HAL_GPIO_WritePin(GPIOA, GPIO_PIN_4, GPIO_PIN_RESET);
- HAL_SPI_TransmitReceive(&hspi1, txData, rxData, 2, HAL_MAX_DELAY);
- HAL_GPIO_WritePin(GPIOA, GPIO_PIN_4, GPIO_PIN_SET);
- return (rxData[0] << 8) | rxData[1];
- }
- /* USER CODE END 0 */
- int main(void)
- {
- HAL_Init();
- SystemClock_Config();
- MX_GPIO_Init();
- MX_SPI1_Init();
- MX_USART1_UART_Init();
- while (1)
- {
- /* USER CODE END WHILE */
- /* USER CODE BEGIN 3 */
- HAL_UART_Transmit(&huart1, (uint8_t*)" \n\r ", 3, HAL_MAX_DELAY);
- for (int ch = 0; ch < 8; ch++)
- {
- int newCh = (ch == 7) ? 0 : ch + 1;
- int val = readADC(newCh);
- float reading = (val * (REF / 4096));
- char MSG[60];
- sprintf(MSG,"ch %d = reading %.2f Volt",ch , reading);
- HAL_UART_Transmit(&huart1, (uint8_t*)MSG, sizeof(MSG), HAL_MAX_DELAY);
- HAL_UART_Transmit(&huart1, (uint8_t*)"\n\r", 3, HAL_MAX_DELAY);
- }
- HAL_Delay(2000);
- }
- }
Proteus Configuration :
- Open Proteus & Create New Project and click next

- Click on Pick Device
- Search for STM32F103C6 & ADC128S102 & POT
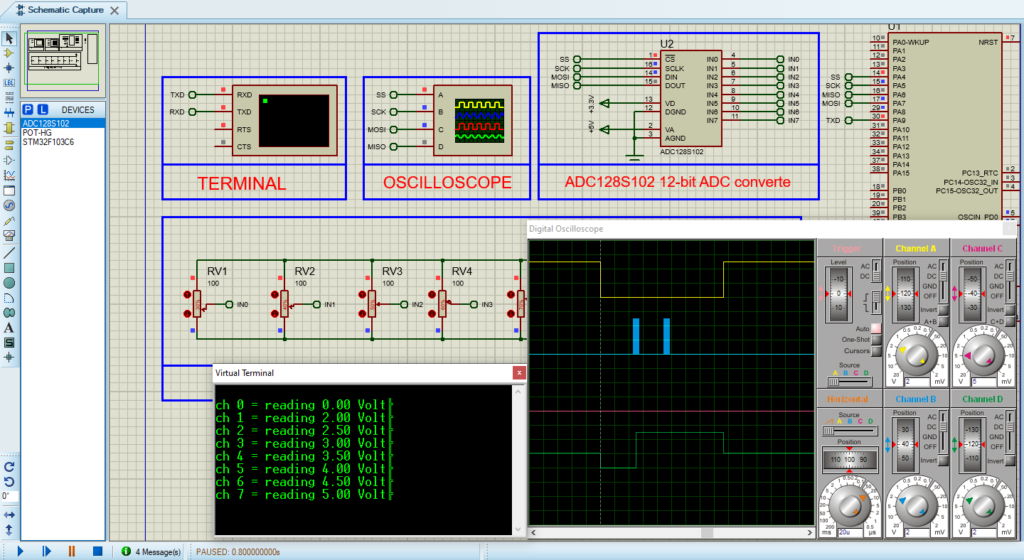
- Click on Virtual Instruments Mode then choose VIRTUAL TERMINAL & OSCILLOSCOPE
Click on Terminal Mode then choose (DEFAULT & POWER &GROUND)
- finally make the circuit below and start the simulation

That’s all!
If you have any questions or suggestions don’t hesitate to leave a comment below.
